The standalone player provides a way for you to use the Garritan Abbey Road Studios CFX Concert Grand without the need to use a host program. Once you set up MIDI and audio, use the standalone player to load and play back MIDI files, or record an audio file of the performance.
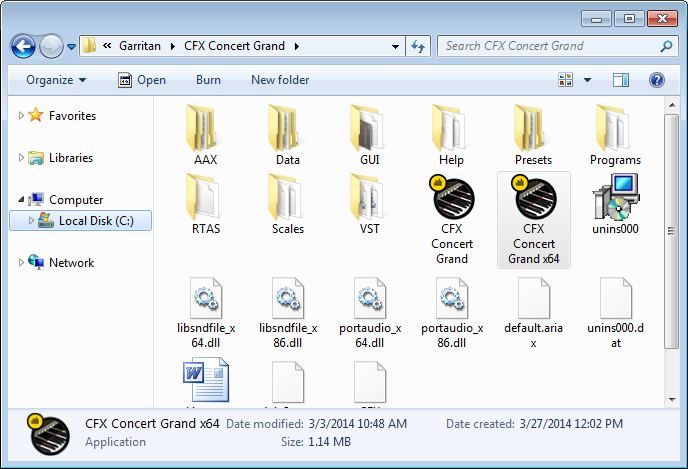
On your computer, find and open CFX Concert Grand x64.exe for the 64-bit standalone player, or CFX Concert Grand.exe for the 32-bit standalone player.
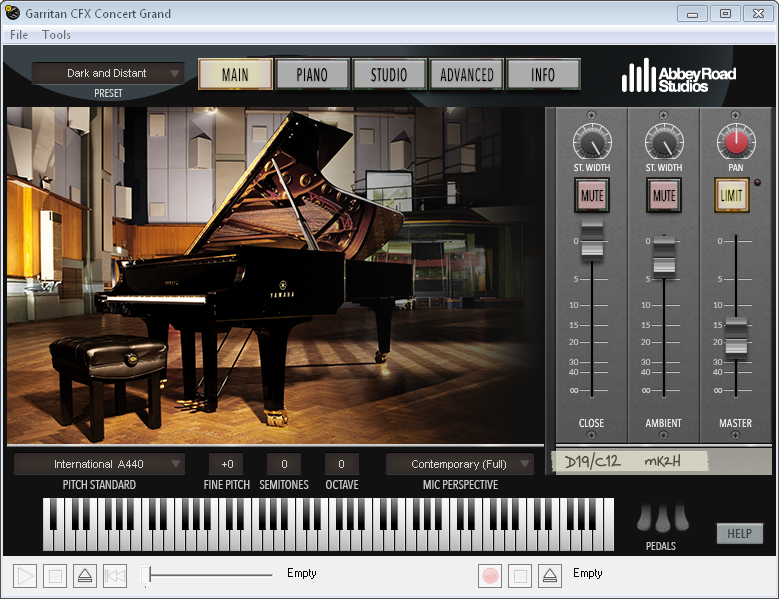
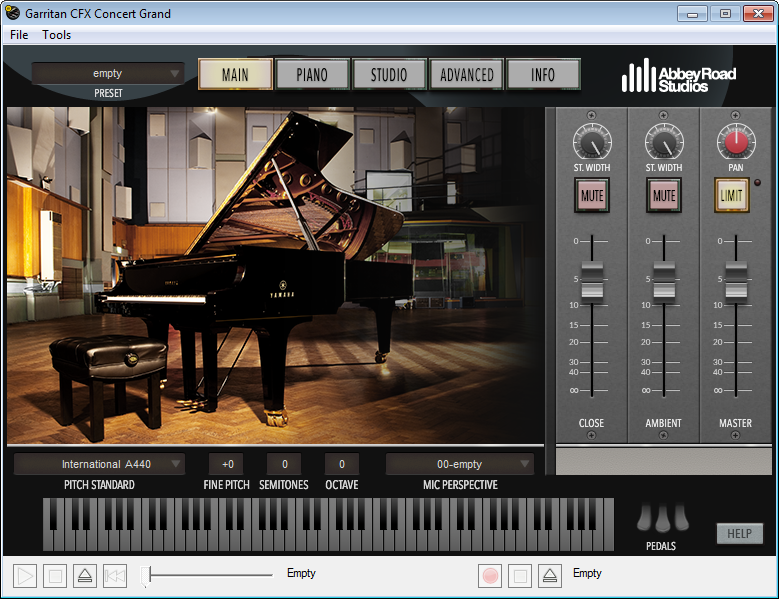
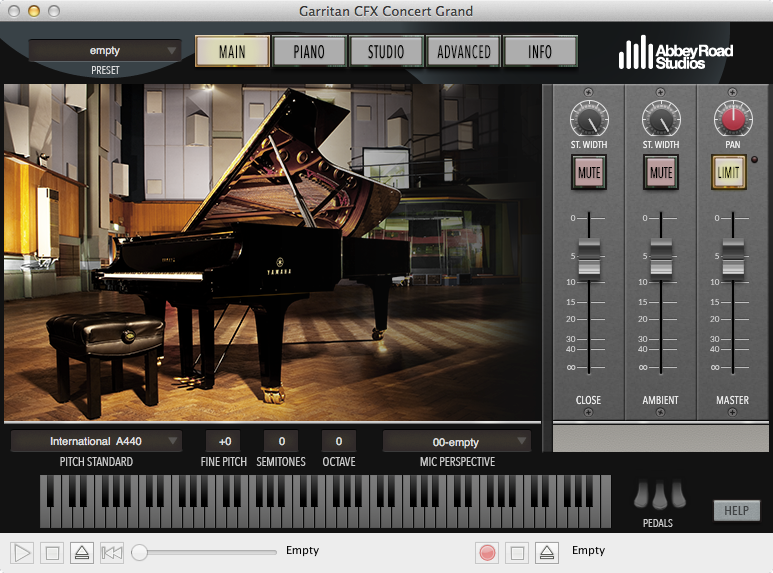
The standalone player appears.
On your computer, find and open CFX Concert Grand. A default installation of the standalone player puts this file in your Applications folder (Macintosh HD/Applications).
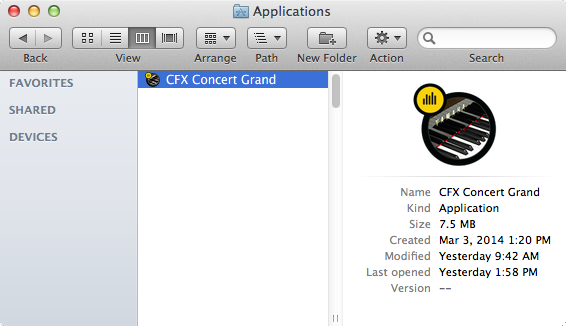
The standalone player appears.
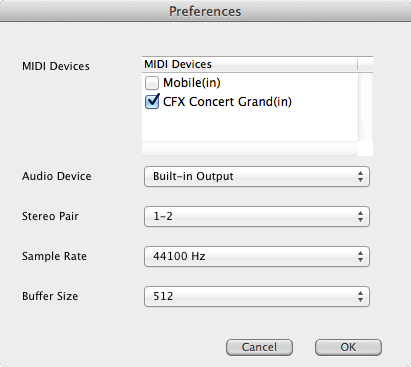
When using the standalone player, set up MIDI and audio preferences so you can hear the instrument and use your MIDI controller. Setting up your preferences includes selections for MIDI input devices, audio device and driver, audio output, sample rate, and buffer size.
If you're using the CFX Concert Grand as a plug-in, audio and MIDI are instead set up within your host program.
The Preferences dialog box appears.
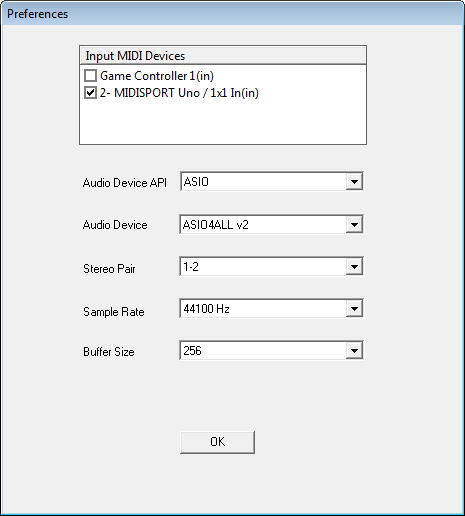
Only available MIDI input devices are displayed. If you're not seeing a device, you may need to turn the device on or install a driver from the device manufacturer, and then relaunch the standalone player.
Note that MIDI devices connected to an audio/MIDI interface may appear as the name of the interface.
An ASIO compatible sound card or audio interface is required for Windows.
Your only option will likely be 1-2, unless you have a sound card or audio interface with multiple outputs.
Available choices are determined by your sound card.
The buffer size is an amount of incoming audio information that your computer stores in RAM to help maintain a continuous stream of audio. A higher buffer size results in more time between pressing a key, and hearing the sound through your speakers.
With a higher buffer size, you'll achieve better fidelity at the expense of more input latency. Lower the buffer size to experience less latency while putting more strain on your sound card and CPU.
After you finish MIDI and audio setup, load a perspective, and then audition the piano with the keyboard or your MIDI controller. If you want to change the feel of your controller, use the Velocity Curve editor.
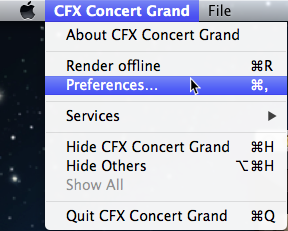
The Preferences dialog box appears.
Only available MIDI input devices are displayed. If you're not seeing a device, you may need to turn the device on or install a driver from the device manufacturer, and then relaunch the standalone player.
Note that MIDI devices connected to an audio/MIDI interface may appear as the name of the interface.
Your only option will likely be 1-2, unless you have a sound card or audio interface with multiple outputs.
Available choices are determined by your sound card.
The buffer size is an amount of incoming audio information that your computer stores in RAM to help maintain a continuous stream of audio. A higher buffer size results in more time between pressing a key, and hearing the sound through your speakers.
With a higher buffer size, you'll achieve better fidelity at the expense of more input latency. Lower the buffer size to experience less latency while putting more strain on your sound card and CPU.
After you finish MIDI and audio setup, load a perspective, and then audition the piano with the keyboard or your MIDI controller. If you want to change the feel of your controller, use the Velocity Curve editor.
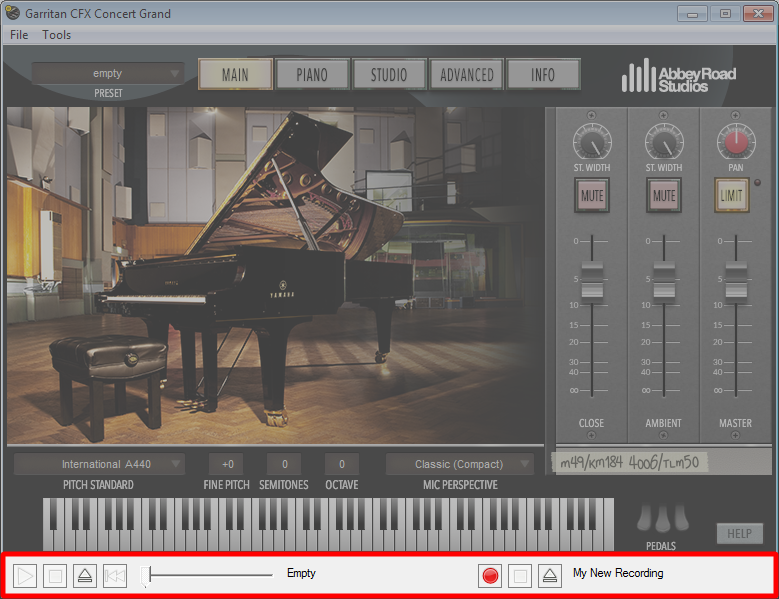
Once you're set up in the standalone player, load and play back MIDI files, record into a WAV audio file, or render an existing MIDI file to a WAV audio file.
 .
.

The Select a MIDI file dialog box appears.

 to start playback.

The loaded MIDI file begins to play back using your currently loaded microphone perspective and other settings.

 to stop playback. The Progress Bar stops in its current position.

 to move the Progress Bar to the beginning of the file.

It is not necessary to load a MIDI file in order to create a WAV file of your playing. Note that recording into a WAV file does not also create a MIDI file of your performance.
.

The Record Audio into dialog box appears.
 becomes available.

Changes you make to the sound of the piano are also heard in the WAV file, whether you're adjusting knobs and faders with your mouse, or sending MIDI CC messages from your MIDI controller.
.

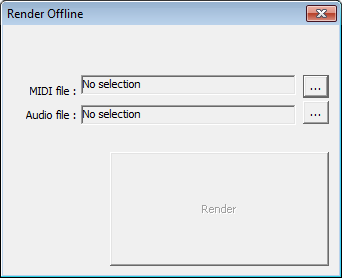
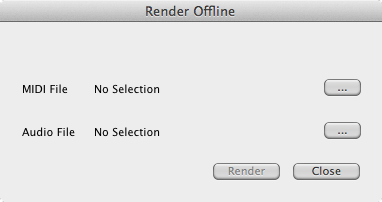
The Render Offline feature allows you to quickly create a WAV audio file from an existing MIDI file.
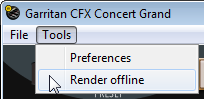
The Render Offline dialog box appears.
 . The Select a MIDI file dialog box appears.
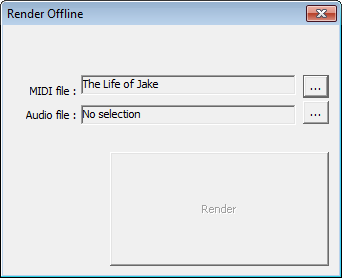
. The Record Audio into dialog box appears.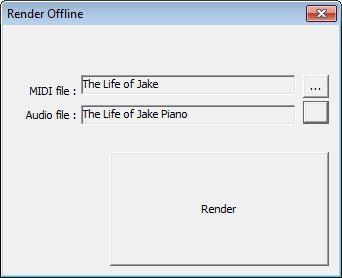
The Render Offline feature allows you to quickly create a WAV audio file from an existing MIDI file.
The Render Offline dialog box appears.
 . The Select a MIDI file dialog box appears.
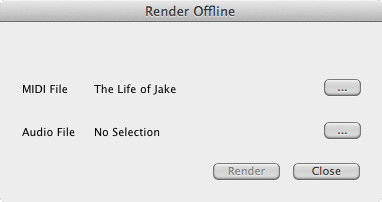
. The Record Audio into dialog box appears.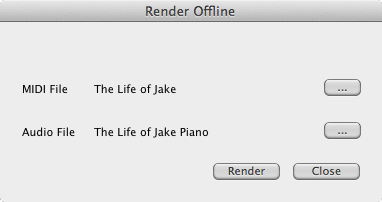
From the File menu on either Windows or Macintosh, you can save your current Garritan Abbey Road Studios CFX Concert Grand settings into a .ARIA preset file that you can recall later, or, you can save a preset that determines the default settings that load when you open the standalone player.
The settings you just saved will load automatically each time you open the standalone player.
A note about saving presets from the standalone player
| Action | Keyboard shortcut |
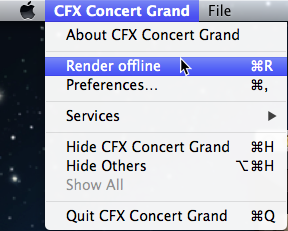
| Render offline | COMMAND+R |
| Preferences | COMMAND+COMMA |
| Hide CFX Concert Grand | COMMAND+H |
| Hide Others | COMMAND+OPTION+H |
| Quit CFX Concert Grand | COMMAND+Q |
| Open | COMMAND+O |
| Save as | COMMAND+S |
| Save as default | COMMAND+D |
To open the standalone player on Windows
To open the standalone player on Macintosh
To set up MIDI and audio in the standalone player on Windows
To set up MIDI and audio in the standalone player on Macintosh
Load MIDI files and record into audio files
To load and play back an existing MIDI file
To record your playing into a WAV audio file
To render a MIDI file to audio offline on Windows
To render a MIDI file to audio offline on Macintosh
Save presets from the standalone player
To set the standalone player default settings

|